Styling KC3 Project Silver

Currently reading:
Styling KC3 Project Silver

With all my existing mods to date and the new intake setup, new cylinder head and with new cams I hope to up the B power to 170bhp plus. for which should be nice.
 

Attachments

  • modified intake.jpg
    modified intake.jpg
    150.5 KB · Views: 59
  • modified intake 1.jpg
    modified intake 1.jpg
    54.6 KB · Views: 52
  • 465883_345851268871776_1666858817_o.jpg
    465883_345851268871776_1666858817_o.jpg
    165.4 KB · Views: 58
  • modified intake 5.jpg
    modified intake 5.jpg
    63.7 KB · Views: 64
  • 1836792_10151965252616247_800208275_o.jpg
    1836792_10151965252616247_800208275_o.jpg
    722.4 KB · Views: 63
How did you remove petrol smell , ive searched everywhere for the source of mine ??

- Removed petrol smell (jubilee clip)
- Changed gear knob (Momo)
- Mounted roll bars (ebay.de)
- Ordered new gas struts for the hood and trunk.

To do list:
- Glass windstop.
- Gas struts.

Best regards

Frank[/QUOTE]
 
Hiya, maybe you have fixed this by now, but the smell usually comes from behind the rear bulkhead ( behinds seats, behind the metal cover) the fuel pipe hoses have standard push on clips so the seals can leak when old and leak fumes. New hoses or usually just a new jubilee clip will solve this. :) easy fix but the difficulty is the removal of seats, trim and rear bulk head.

Look at the photos and you can see the blue fuse hoses and the large black one that feeds the tank, check all clips , replace or tighten.
Hope this helps. :)
 

Attachments

  • IMG_3289.JPG
    IMG_3289.JPG
    553.2 KB · Views: 65
  • IMG_3291.JPG
    IMG_3291.JPG
    481.1 KB · Views: 59
Last edited:
Hi, on top of the tank there are also two vents with pipes attached. The seal around the vents also age and become hard allowing fumes to escape when the fuel tank is mainly full or over half full. These can be replaced and are available from Henk at Barchettaparts.com and from italy. A temporary fix is to spray/soak the seal while it is insitue with a silicon spray and work or wiggle the fitting to make the silicon soak into the seal. This sometimes revives the seal and makes a temporay fix. They can be very difficult to remove.
SteveD
 
Its been a long time to upgrade with some modifications, but have some great plans ahead.

Engine will come out and will color change under bay to match the tungsten silver, it was the only area that never got repainted so wish to get it done.
this will complete the color upgrade.
 
A Battery relocation to the rear will be part of the new mods and here is some of the parts purchased for this.

New battery -75amp
Positive/ negative terminal confections
New tray and top holder
Battery cut off switch (this will isolate the battery when the B is stored up winter months)
5meters of 50mm /0guage Red Cable
1meter of 50mm /0guage Black Cable
8mm/10mm ring terminals for cables
300amp Trip switch
Positive Terminal Distribution block for engine bay connections.
Booster / Jump terminals for upfront in the bay.
 

Attachments

  • 362283434_238081192521584_1254946784127189884_n.jpg
    362283434_238081192521584_1254946784127189884_n.jpg
    6.4 KB · Views: 21
  • 362527404_190578460666248_1903400893551339245_n.jpg
    362527404_190578460666248_1903400893551339245_n.jpg
    10.6 KB · Views: 25
  • 363284835_180795694858582_1560398386985175356_n.jpg
    363284835_180795694858582_1560398386985175356_n.jpg
    5.4 KB · Views: 20
  • 363307076_1443207819802459_6282578162794495272_n (1).jpg
    363307076_1443207819802459_6282578162794495272_n (1).jpg
    5 KB · Views: 19
  • Like
Reactions: ben
Hi fellow Barchettaristas, 🤗

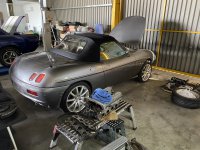
So new works have finally begun on my B after a long sleep and hibernation.

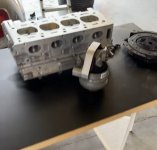
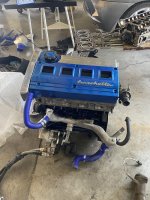
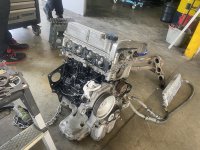
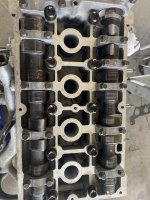
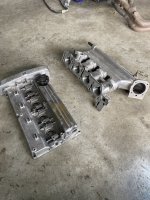
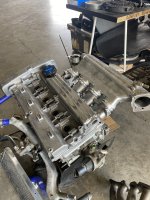
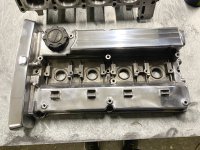
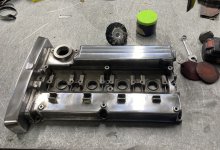
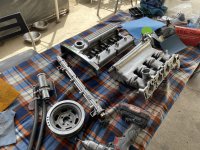
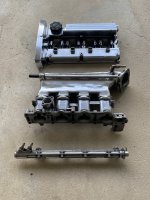
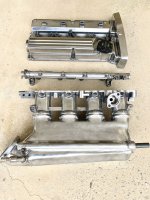
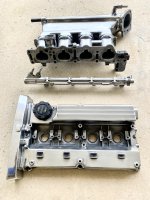
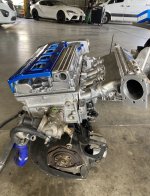
Engine has come out for a good clean , repaint and overhaul .

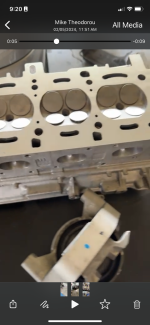
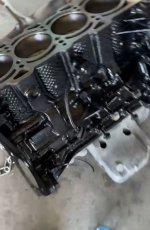
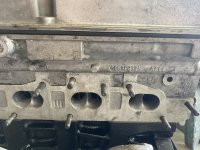
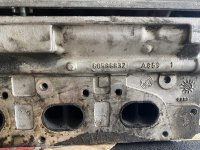
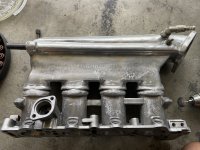
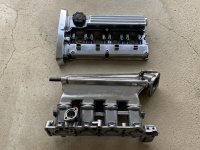
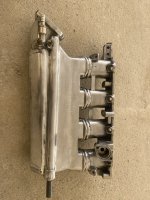
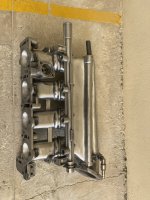
New time belts /pulleys etc. and Im slightly retuning , reworking the Cylinder head .
Re skimmed, Polished/ported, and valves three cut seated and sealed /pressure tested along with 2.0 ltr Alfa Cams .

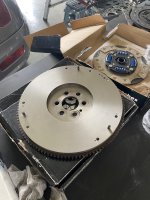
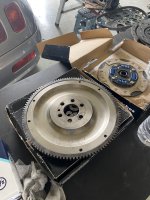
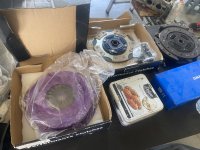
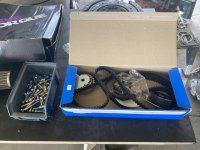
New performance road/race clutch and lightened/balanced flywheel.

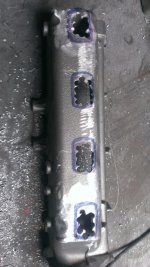
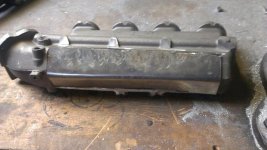
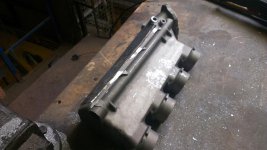
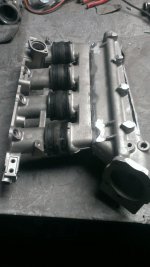
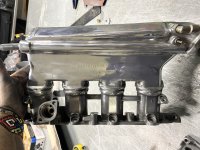
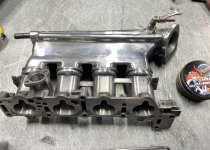
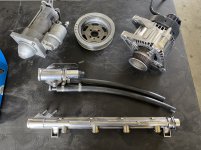
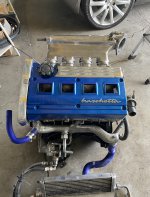
The performance intake is being tweaked to be better also.

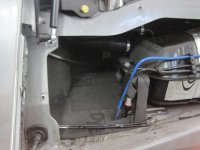
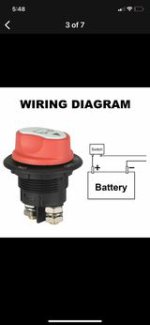
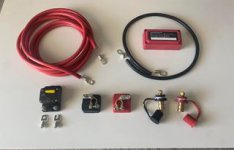
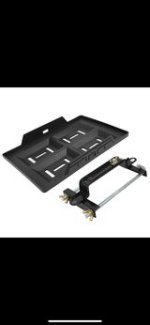
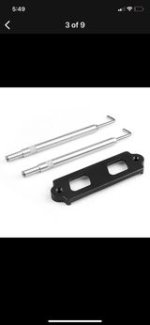
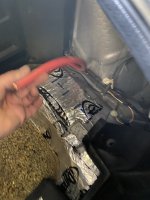
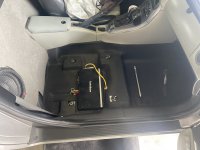
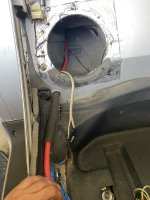
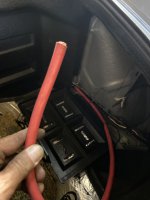
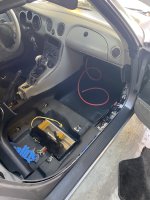
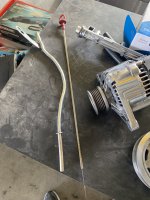
Battery in the boot upgrade and all earth straps will be stronger and improved upon .
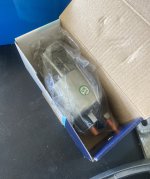
Starter motor new solenoid.
 

Attachments

  • IMG_0968.jpeg
    IMG_0968.jpeg
    359 KB · Views: 10
  • IMG_0970.png
    IMG_0970.png
    1.5 MB · Views: 331
  • 49bffb9f-36c8-4c22-b2a1-f6fd2bef116a.mov
    3.9 MB
  • IMG_0974.jpeg
    IMG_0974.jpeg
    633.4 KB · Views: 10
  • IMG_0937.jpeg
    IMG_0937.jpeg
    1.8 MB · Views: 21
  • IMG_0938.jpeg
    IMG_0938.jpeg
    1.9 MB · Views: 142
  • IMG_0944.jpeg
    IMG_0944.jpeg
    2.8 MB · Views: 21
  • IMG_0945.jpeg
    IMG_0945.jpeg
    3.8 MB · Views: 84
  • IMG_0890.jpeg
    IMG_0890.jpeg
    2.5 MB · Views: 144
  • IMG_0898.jpeg
    IMG_0898.jpeg
    2 MB · Views: 52
  • IMG_0896.jpeg
    IMG_0896.jpeg
    2 MB · Views: 33
  • IMG_0893.jpeg
    IMG_0893.jpeg
    2.3 MB · Views: 25
  • IMG_0892.jpeg
    IMG_0892.jpeg
    2.7 MB · Views: 23
  • IMG_0920.jpeg
    IMG_0920.jpeg
    2.5 MB · Views: 36
  • IMG_0917.jpeg
    IMG_0917.jpeg
    2.1 MB · Views: 53
Last edited:
For the battery in the boot upgrade I have removed the seats and side trim a running new high power cable to the rear. Lucky enough I have access through the side panels and to the rear boot via the subwoofer hole from my previous modifications and rear fire wall. 🤗

More details and pics to follow as we progress .
🏎️🏁
 

Attachments

  • IMG_0948.jpeg
    IMG_0948.jpeg
    2.1 MB · Views: 174
  • IMG_0951.jpeg
    IMG_0951.jpeg
    2.7 MB · Views: 66
  • IMG_0930.jpeg
    IMG_0930.jpeg
    2.5 MB · Views: 67
  • IMG_0949.jpeg
    IMG_0949.jpeg
    2.1 MB · Views: 23
  • IMG_0950.jpeg
    IMG_0950.jpeg
    3.5 MB · Views: 50
A little more progress today ,

Inlet welded and gradually being polished up .
New battery cable routed through car from front to back .
 

Attachments

  • IMG_1038.jpeg
    IMG_1038.jpeg
    2.1 MB · Views: 111
  • IMG_1040.jpeg
    IMG_1040.jpeg
    2.7 MB · Views: 96
  • IMG_1027.jpeg
    IMG_1027.jpeg
    2 MB · Views: 149
  • IMG_1035.jpeg
    IMG_1035.jpeg
    2.3 MB · Views: 92
  • IMG_1034.jpeg
    IMG_1034.jpeg
    3 MB · Views: 21
  • IMG_1030.jpeg
    IMG_1030.jpeg
    1.9 MB · Views: 87
  • Like
Reactions: tjr
Hi guys,

Some more progress today , I do a little every now and then when I can .

Started to polish up the rocker cover and the sports inlet manifold .

Not fully finished but gradually getting to a high shine finish .
 

Attachments

  • IMG_1091.jpeg
    IMG_1091.jpeg
    2.7 MB · Views: 34
  • IMG_1089.jpeg
    IMG_1089.jpeg
    3.2 MB · Views: 113
  • IMG_1092.jpeg
    IMG_1092.jpeg
    2.7 MB · Views: 137
  • IMG_1087.jpeg
    IMG_1087.jpeg
    2.3 MB · Views: 119
  • IMG_1090.jpeg
    IMG_1090.jpeg
    2.8 MB · Views: 132
  • IMG_1084.jpeg
    IMG_1084.jpeg
    2.9 MB · Views: 92
More sanding and polishing today , the better and smoother the better the shine, it’s slow tedious work but should make the engine bay pop,
✨🏁🙏
 

Attachments

  • IMG_1143.jpeg
    IMG_1143.jpeg
    2.3 MB · Views: 21
  • IMG_1144.jpeg
    IMG_1144.jpeg
    2.4 MB · Views: 60
  • IMG_1146.jpeg
    IMG_1146.jpeg
    3.2 MB · Views: 80
  • IMG_1145.jpeg
    IMG_1145.jpeg
    3.2 MB · Views: 29
Last edited:
So now im into this polishing up of aluminum parts. Today i did a few more .

Alternator, Oil dipstick , throttle body linkage, idle control valve and injector rail and also cleaned up some other engine components.
 

Attachments

  • IMG_1153.jpeg
    IMG_1153.jpeg
    1.8 MB · Views: 92
  • IMG_1158.jpeg
    IMG_1158.jpeg
    2 MB · Views: 70
  • IMG_1161.jpeg
    IMG_1161.jpeg
    1.9 MB · Views: 10
  • IMG_1169.jpeg
    IMG_1169.jpeg
    2.2 MB · Views: 64
  • IMG_1189.jpeg
    IMG_1189.jpeg
    2.1 MB · Views: 84
  • IMG_1187.jpeg
    IMG_1187.jpeg
    2.5 MB · Views: 105
  • IMG_1183.jpeg
    IMG_1183.jpeg
    2.2 MB · Views: 81
Back
Top