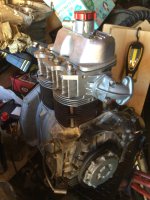
Tuning 650 Goldie

Currently reading:
Tuning 650 Goldie

Toshi 975

Prominent member
Joined
Jun 30, 2009
Messages
1,934
Points
629
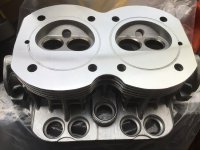
I am still fiddling with the finer points on the 540cc Nanni project but while the weather is still warm enough for my hands to work I am initiating a new project and a new name, “650 Goldie” , using the parts I have accumulated over the years. So already have a low mileage Bis crankshaft mounted in a bare 650 crankcase and I am just back from L E Cramer Motor Engineers in Watford, used to be known as Green and Weatherly. Had a 1.6 mm skim on a new 1993 650 cylinder head in line with the recommendations of the Blitz Racing tuning instructions.
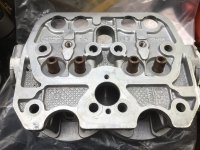
9522359C-2A22-4FF2-845A-CC62732837D8.jpegC0338336-C3E9-4DFC-8D92-9CC00A33F49B.jpeg
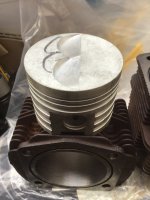
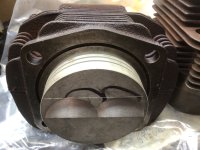
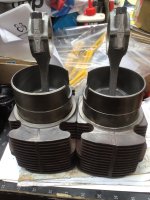
Had a pair of cylinders bored out to suit a pair of special pistons that I bought last year. Prices have sure gone up since I first used the company to regrind the crankshaft from my Mk 1 Cortina in the early 70’s 😳
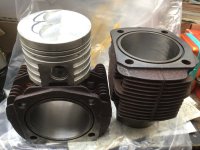
9A465868-AEEA-4EEA-9DE3-7098C1179E8E.jpeg0245C6AD-702D-4B6E-8C12-900D5C98684B.jpegB33117A0-377C-4664-9291-C48C1A25E5C0.jpeg
 
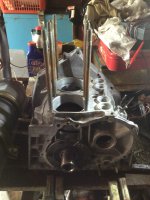
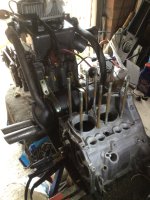
Dusted off the 650 crankcase and removed a few spider webs. I had already fitted a low mileage Bis crankshaft and bearings Some time ago. So it is up on the bench next to the 540cc motor
.0E7E6523-8698-4687-B427-00A10070C10B.jpeg39ECB948-6686-491D-A187-BF6D39BE551E.jpeg
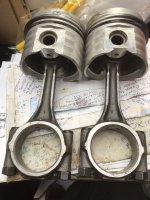
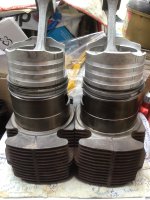
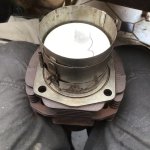
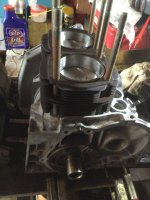
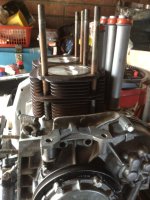
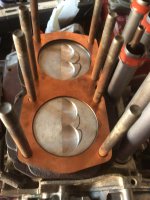
pistons now fitted with the rings. Even though the rings are original Fiat there are no marking on them and just by chance I noticed that the oil scraper rings had a tiny chamfer on one side of the contact face so had to do a little research which told me the chamfer faced the piston crown. Brand new con rods fitted to the pistons taking note of the piston offset and the orientation of the rods with the end cap numbers facing the camshaft side. Trusty piston ring clamp helped get me over that nervy bit of fitting the pistons to the cylinders. Copper cylinder base gasket rings in place then dropped the cylinders etc into place.
F3BDC2CD-38D5-4E47-9BF7-86E7AB67C09B.jpegEB07C557-D56E-4553-B215-50BFA885AC87.jpeg54E7E785-3C68-4E76-B363-F6BD496DA938.jpegA47E34B3-1538-48B6-A543-CBB863F63034.jpeg8E7A2467-A204-4C88-9AD4-1E98BD6970AF.jpeg
That was enough excitement for today 😀
 
Upended the engine using a bungee around the cylinder studs to hold the cylinders in place. Aligned the con rods with the crankshaft and fitted the big end caps with New big end shells.
FAF64DEE-8316-4CFB-A428-5F8CD2A76A71.jpeg
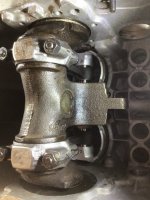
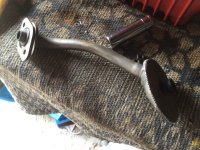
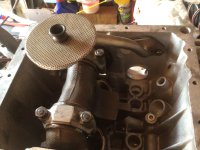
Sorted out a 126 oil pickup tube and fitted with a new o-ring seal, a part you hardly ever find in a complete engine gasket set.
3C37DC53-09AC-4765-9C0A-B21A49AD36A4.jpegA4FDAECB-7D4B-4F56-8A6F-E2120F49FB25.jpeg
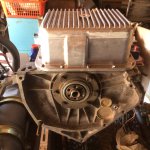
Alloy sump all ready to be fitted using suitable stainless steel hex screws and washers. Used sealant and no gasket to make the crankcase more rigid.
8619EE13-B6CC-47E7-AB0B-71AB62EAD233.jpeg
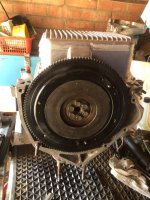
Popped a lighter 500 flywheel on that I had already prepared.
C8BFA5E2-B517-45B2-A184-D6BFDC2B0D40.jpeg
Now the engine could go the right way up and sit on the firm base. Sat down, checked the Haynes manual just in case I had missed anything and realised I had got out of sequence as they fit the camshaft and timing gear before the crank 🙀
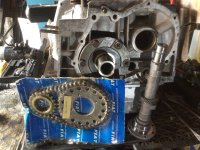
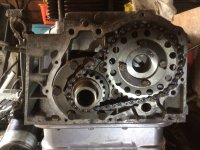
No damage done though as I fitted a brand new Italian made steel sport 35/75 camshaft then a new timing chain set making sure I had lined up the timing marks on the cogs correctly. I waited until daylight for this as artificial light was casting shadows and I dare not get it wrong.
1CECBF5C-20EA-40D5-8F68-3A0410F086F1.jpeg91285129-98C3-4AA9-9103-FB745D25A559.jpeg
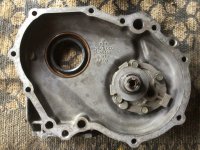
Found a good timing chain cover in my parts, stripped out the oil pump which was also very good. The cover needed a lot of cleaning starting with washing in petrol followed by going in the dishwasher with some other engine and suspension parts 😀
Then about 1 1/2 hours of manual and Dremel powered wire brushing until I was happy with it. All ready to go on now with a new oil seal fitted.
C6BCB5AD-5F39-471F-8BD3-9F22BF963366.jpeg
 
Upended the engine using a bungee around the cylinder studs to hold the cylinders in place. Aligned the con rods with the crankshaft and fitted the big end caps with New big end shells.
View attachment 413259
Sorted out a 126 oil pickup tube and fitted with a new o-ring seal, a part you hardly ever find in a complete engine gasket set.
View attachment 413260View attachment 413261
Alloy sump all ready to be fitted using suitable stainless steel hex screws and washers. Used sealant and no gasket to make the crankcase more rigid.
View attachment 413262
Popped a lighter 500 flywheel on that I had already prepared.
View attachment 413264
Now the engine could go the right way up and sit on the firm base. Sat down, checked the Haynes manual just in case I had missed anything and realised I had got out of sequence as they fit the camshaft and timing gear before the crank 🙀
No damage done though as I fitted a brand new Italian made steel sport 35/75 camshaft then a new timing chain set making sure I had lined up the timing marks on the cogs correctly. I waited until daylight for this as artificial light was casting shadows and I dare not get it wrong.
View attachment 413265View attachment 413266
Found a good timing chain cover in my parts, stripped out the oil pump which was also very good. The cover needed a lot of cleaning starting with washing in petrol followed by going in the dishwasher with some other engine and suspension parts 😀
Then about 1 1/2 hours of manual and Dremel powered wire brushing until I was happy with it. All ready to go on now with a new oil seal fitted.
View attachment 413267
When I have just the barrels in place on the crankcase, I use a pair of the plastic legs that come with a washing machine when it is delivered to hold the barrels in place. Drill out the centre of the plastic 'delivery' legs to match the barrel/head studs, put the soft end of the 'legs' on the barrels. a couple of washers to take up any excess stud thread length and then a pair of old head nuts---they only need to be finger tight, and using just one 'delivery leg' per barrel keeps them in place.
 
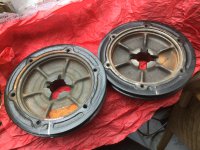
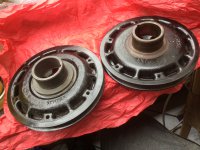
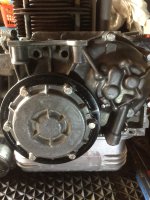
With the timing chain cover fitted I was ready to fit the crankshaft pulley
9B83D7E9-EA4F-4EFA-9E6D-555073FF1092.jpegC5210476-948A-4BD6-9987-FEAA3E125B10.jpeg
looked through my parts and picked out the one on the right which I fitted and tightened the big hollow bolt only to discover that the crank was now locked up. What have I done wrong ? Refitted it a couple of times looking for the problem and then discovered that the back of the pulley was in contact with the timing chain cover. A little more panic then looked at the other pulleys I had and saw the cut out groove in the back of the others. So I had fitted a 500 pulley to a 126 engine which does not work. Swopped the pulley and all was good.
0845DA31-BDBD-4CC4-9128-BE40D4F06016.jpeg
Consulted Mr Haynes after the pulley cover was fitted with a new o-ring seal and the next instruction was to fit the cam followers and the push rod tubes which also have nice new seals
747EF880-36F4-482D-BB62-BB6024CEDF4A.jpeg
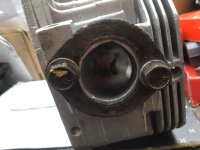
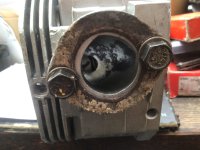
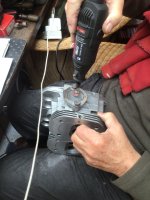
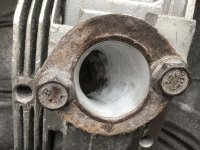
Next step is the cylinder head. I had already had a virtually new late model head skimmed by 1.6mm and it is all very good apart from the casting around the exhaust outlets which looked poorly shaped to me so I fixed two old gaskets to the head to use as templates.
611BB26C-D52A-470E-BF77-F4E28F615E32.jpegDF35D148-70F6-4F99-98C6-A0EB75085F9C.jpeg
So out came the Dremel and a fair bit o work with small abrasive rollers. I had to stop every so often to allow the Dremel to cool down but got a very acceptable result in the end.
EC3C18C2-B1C4-4E49-A7B0-D306B1CB55BF.jpegA694A8E6-B809-4F67-BAE7-69497CF3D489.jpeg
 
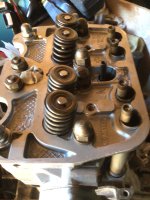
Although progress has slowed I have got a lot further into this project that I anticipated at this point which is pleasing. Fitted a solid copper head gasket then the newly prepared cylinder head with the 1.6mm skim, the porting work and a bit of valve grinding. All torqued down.
64DEBC2C-72E4-4845-843A-5D0F7ABE0B5D.jpegA2354A58-27E9-4974-B4AC-007C96781CD0.jpeg64EEAB2D-2EAC-4F8E-8E8C-4E0EB2707E56.jpeg
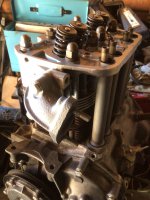
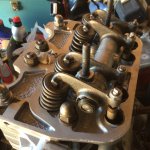
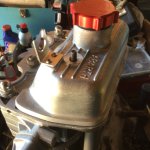
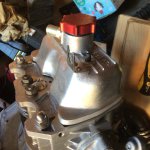
Found some new studs in my parts so dropped on a nice set of rockers which are yet to be fixed and the valve clearances set. Then just for protection dropped on an alloy rocker cover.
4A6D0DC3-0355-4CEC-88EA-82A2F9A175DF.jpegF019F779-9F07-4240-8D5A-00BFCE0FD53F.jpegBE36CC10-8856-4AD4-90A9-9F51223F6A81.jpegF7AA5772-56DB-403B-9DE5-7173D5F9A5BA.jpeg
 
Just in case anybody was following this build it came to a sudden halt. A guy came round to pick up a carb from me, saw the engine and 15 minutes later he had it in the back of his car, he could not even wait for me to finish it.
 
Back
Top