

You are using an out of date browser. It may not display this or other websites correctly.
You should upgrade or use an alternative browser.
You should upgrade or use an alternative browser.
Latest updates
Filters
Show only:
Loading…

Punto (Mk1) Project R the Mk1 Cabrio Restoration project
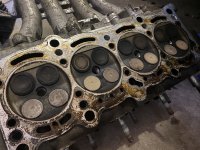
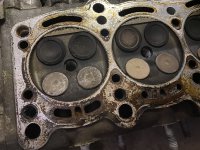
Cylinder head stripped down cleaned, combustion chambers given a light polish and the ports all given a going over to remove burrs moulding marks and anything else that will disrupt airflow.
The valves are all now clean and have been kept with all their own original parts, this engine has double valve springs which is impressive the collets have all been cleaned.
One of the discoveries is that the exhaust valves were so dirty and coked up even when fully open they would have had a considerable restriction in air flow.
They also had a about a mm of cack as were the intake valves the amount of carbon in the engine both in the combustion chamber and on top of the pistons would have massively decreased the displacement, airflow and increased the compression ratio this is probably why I was getting such high figures on the compression test
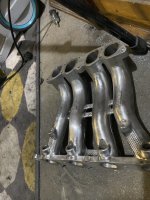
The air intake pipe work has also been cleaned up and will need a wash in the industrial parts washer (dishwasher) to get all the grit and grim out of the inside.


Attachments

Punto (Mk1) Project R the Mk1 Cabrio Restoration project
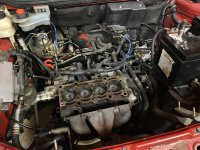
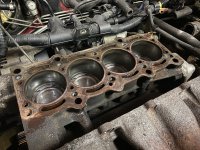
Finally got the head off the engine tonight, fairly straight forward and no blood was spilled, the head bolts turned into a two man job as someone had put the head bolts in with thread lock once the thread lock was broken they came out very easily, if I had to guess I would say it’s had a head gasket before.
I also found a leak between one of the water channels and the oil channel via the head gasket, it was only tiny but it’s reason enough to take the head off.
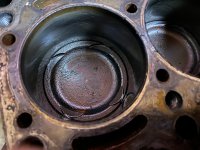
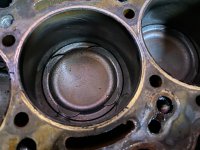
The one thing that had me worried is everything on the intake side was covered in a fine layer of grit, all on the inside of the inlet manifold and it turns out a lot of the dirt on top of the pistons was this mixture of oily grit,
That being said the sides of the bores are perfect and show virtually no signs of wear.
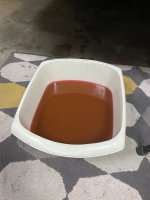
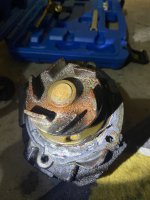
The water pump was grim and had kinda rust all over it, the coolant was murky brown, the oil was really dirty worse than what I drained out of the diesel Punto Evo with 176k on the clock. So I think it’s had a serious lack of servicing in recent years.
I am hoping that once back together this is going to be a good little engine, aside from needing a damn good clean everything moves smoothly and freely, the pistons are actually in good shape if you clean the crap off, so the next stage involves a lot of cleaning and a nylon brush
Attachments
Punto (Mk1) Project R the Mk1 Cabrio Restoration project
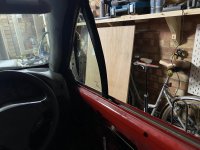
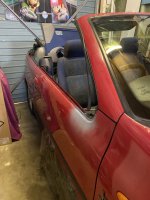
This last week I decided a nice quick job would be to sort out the very slow/week electric windows before the motors burn out. The car has one touch up and down but you have to keep pressing it as the motor frequently thinks the window has closed due to increased resistance.
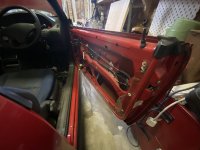
So to get the window motor out you have to remove the door card and all the trims from inside, then you have to remove the weather seals from the top of the door which are clearly the original version that someone at Bertone has taken a Stanley knife to. The little front quarter lite glass it turns out holds the wing mirror on the car along with some others bits, there is a window runner that goes to the bottom of the door and it all has to come out to take the window motor out. I thought it would be wise to repaint the metal work of this piece while off the car, give it a coat of satin black but it turned out the can of black I had on the shelf and was maybe 15 years old, had gone bad and so I needed to wait for that to dry, sand it off and repaint it again, when putting it all back together one of the bolts sheered off, which I then had to drill out and retap.
Finally reassembling it all, and it seems a lot of bloody work for very little accomplished.
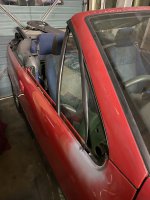
The frames/runners that support the glass all have adjustment screws to dial in the angle of the window to make sure it seals against the roof and door frame. So another couple of hours spent getting it all set up correctly.
Whoever designed this needs to be shot
Attachments
Punto (Mk1) Project R the Mk1 Cabrio Restoration project
So with the car seeming down on power, I opted to start with the spark plugs, aside from being rather old and rusty, one of them was also broken which can’t help.
I’m begining to think there is not one specific reason for the low power and it’s likely to be a culmination of issues.
Punto (Mk1) Project R the Mk1 Cabrio Restoration project
Weirdly I have wanted a Punto Cabriolet since about 2010, I remember seeing them selling very cheaply at the time on Gumtree and thinking it would be cool to have one.
If you've not noticed I have a bit of a thing for Convertible/cabrio cars, I don't know why I just love driving with the roof down in the summer and I love the complexity of a roof that disappears into the back. For me it always has to be a fabric roof with no roll over bar, and the Mk1 Punto was one of very few cars in the 90s when I was growing up that didn't have a hideous roll over hoop, such as the likes of the Escort or the Golf mk1 and mk3/3.5 cabrios.
Here is the story of how I came to get the car, many of you know I run my own youtube channel with quite a few subscribers now so this was not just a chance to relaunch/revamp the channel as it has sat unloved for about 2 - 3 years, but also a chance for me to get a car I had wanted for a long time.
I am also linking my new videos back to this thread on the forum so people can follow things and chip in with ideas and advice if they want.